The Complete Guide to Outdoor Infrared Saunas: Installation, Electrical, and Climate Engineering
Key Takeaways
- You CAN put an infrared sauna outside — but it must be purpose-built. An indoor sauna placed outside will fail within 2-5 years from moisture intrusion, inadequate insulation, UV damage, and electrical issues. A properly engineered outdoor sauna has sealed roofing, R-8 to R-13 insulation, outdoor-rated GFCI electrical, and weather-resistant construction
- Foundation: level is non-negotiable. Best options: 4-inch concrete pad with slight drainage slope, compacted gravel pad (4-6 inches over landscape fabric), or a structurally adequate deck. NEVER place directly on bare ground — moisture wicks up and promotes rot even in cedar
- Electrical: dedicated circuit (20A/120V or 30A/240V), GFCI protection required by code, outdoor-rated conduit, weatherproof disconnect switch. Hire a licensed electrician — outdoor electrical near heat is NOT a DIY project. NEC Article 424 applies
- Climate engineering: cold climates need R-8 to R-13 insulation and 15-20 min preheat (vs 5-10 in mild weather). Hot climates benefit from shade and evening sessions. Humid climates need ventilation after every session. Tongue-and-groove joinery accommodates freeze/thaw expansion
- The #1 reason people choose outdoor: contrast therapy access. Position a cold plunge 5-10 feet from the sauna door. 30 min sauna at 135-140 degrees F then 2-5 min cold plunge at 50-59 degrees F triggers both heat shock AND cold shock proteins — the full hormetic response
"Can I put an infrared sauna outside?" Yes — but not just any sauna. An indoor sauna placed on your deck without modification will fail within 2-5 years. Moisture will intrude through unsealed joints. Inadequate insulation will make it struggle in cold weather and waste electricity. UV will degrade the wood. Rain will pool on a flat roof not designed for drainage. Indoor-rated electrical exposed to weather creates hazards.
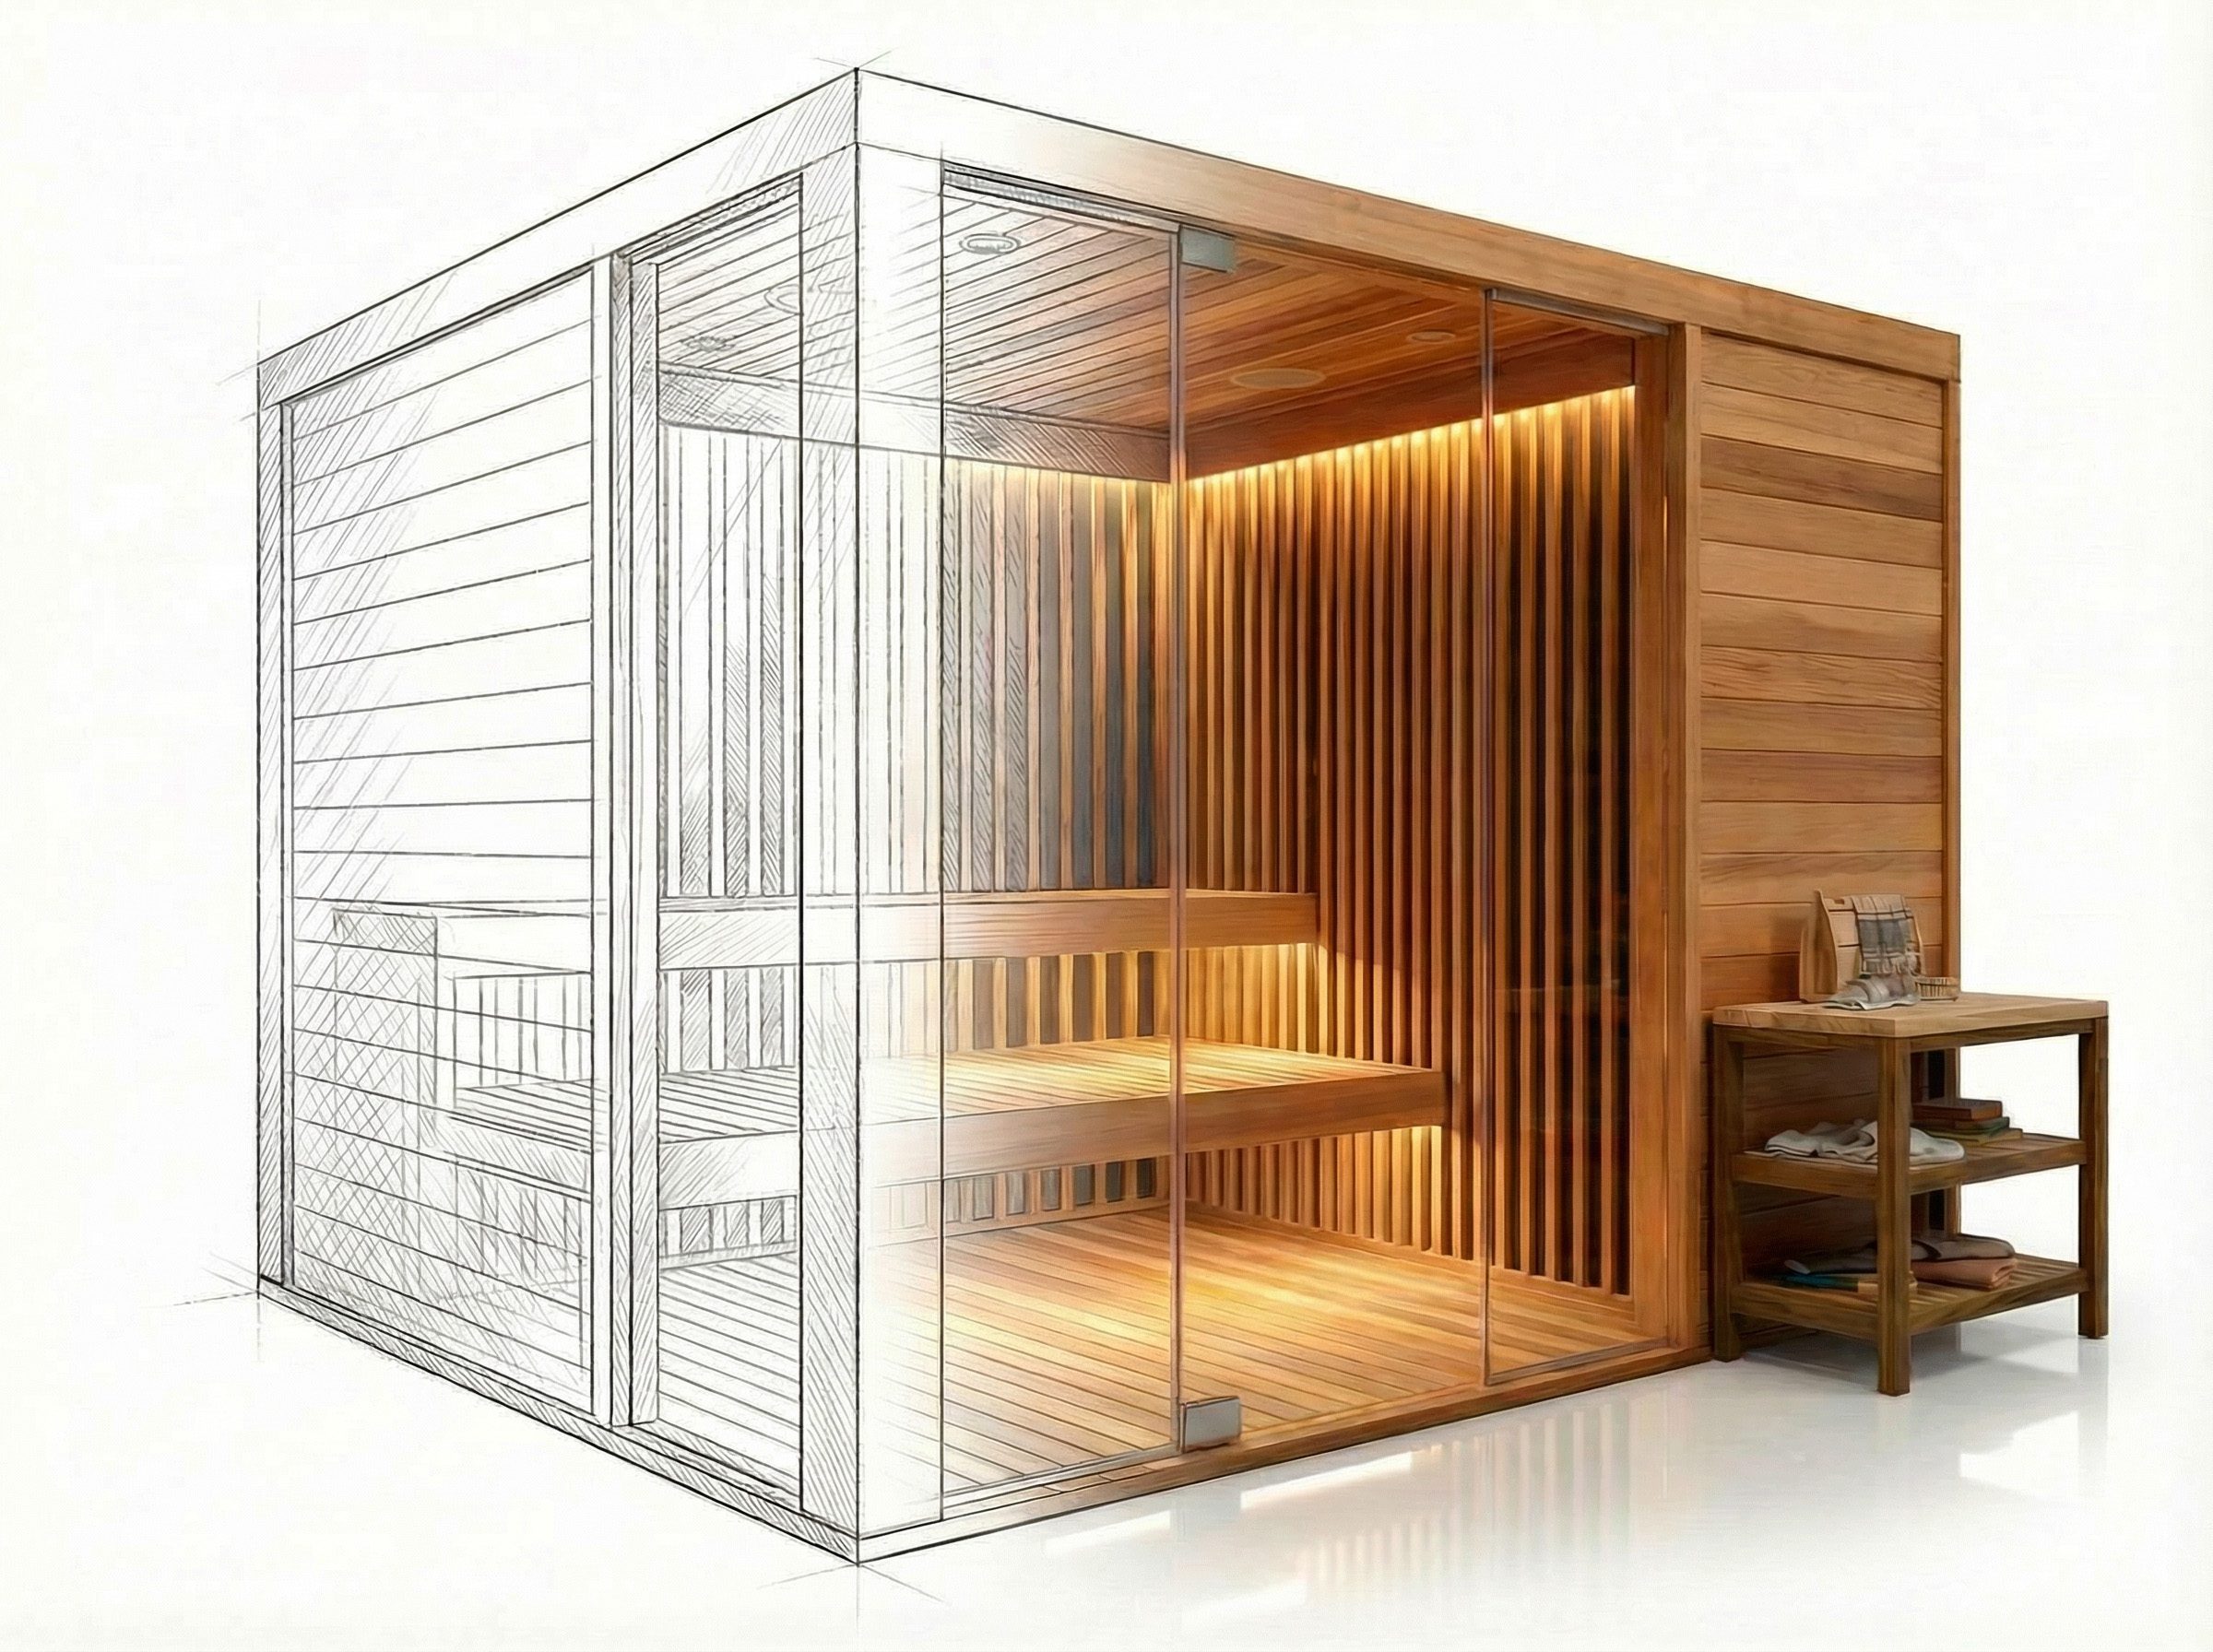
A purpose-built outdoor infrared sauna is engineered from the ground up for weather exposure: sealed roof with drainage, upgraded insulation for your climate zone, outdoor-rated GFCI electrical, UV-protected cedar, proper foundation requirements, and ventilation designed for temperature extremes. Many companies sell indoor saunas and say "can be used outdoors" — that's marketing, not engineering.
This guide covers everything you need to plan an outdoor installation — location, foundation, electrical, weather protection, insulation, contrast therapy setup, and maintenance. It applies regardless of brand, though we'll note where SaunaCloud's Outdoor model addresses each consideration specifically.
Indoor Sauna Outside vs Purpose-Built Outdoor
Indoor sauna placed outside
Will fail
Minimal insulation (R-3)
No roof drainage
Indoor-rated electrical
No weather sealing
No UV protection
Lifespan: 2-5 years outdoors
SaunaCloud Outdoor model
Engineered for weather
Upgraded insulation (R-8 to R-13)
Sealed roof with overhang + drainage
Outdoor-rated GFCI electrical
Weather-sealed joints + door gasket
UV-protected Western Red Cedar
Lifespan: 20-30+ years outdoors
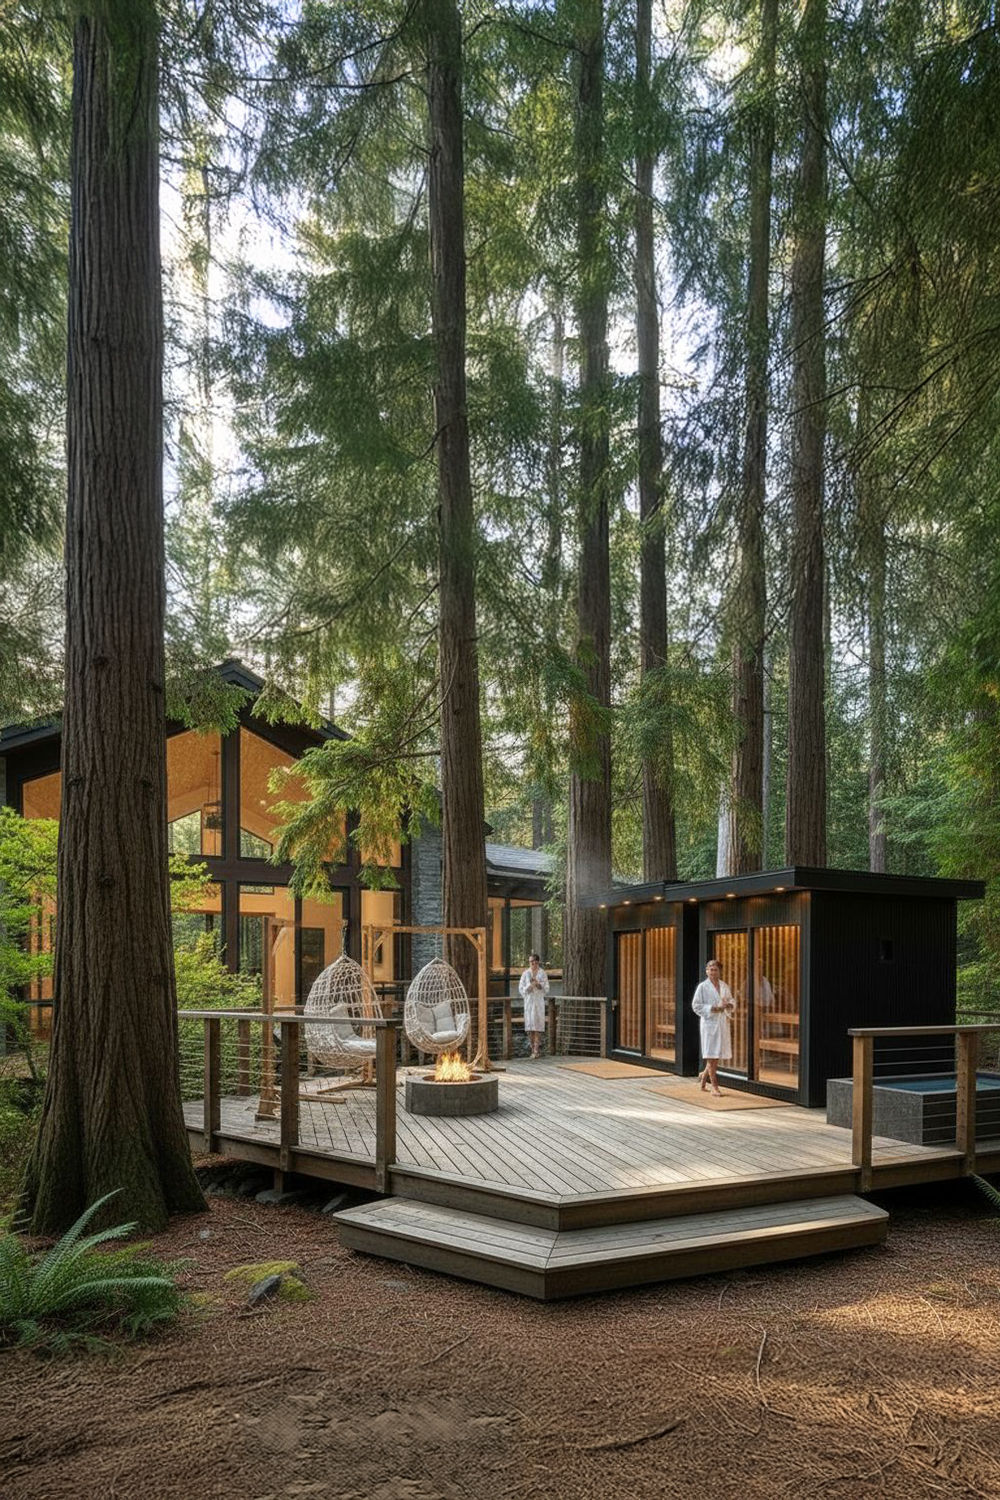
Where to put your outdoor sauna
- Deck or patio: Most common location. Must support 600-900 lbs (sauna + occupants). Check load capacity with a contractor. Level surface required
- Concrete pad: Ideal foundation. Pour a 4" pad with slight slope (1/4" per foot) for drainage. Level, permanent, moisture-proof
- Gravel pad: Acceptable if properly compacted. 4-6" crushed gravel over landscape fabric. Lower cost than concrete
- Direct on ground: NOT recommended. Moisture wicks up from soil, promotes rot even in cedar, attracts insects. Always elevate
- Poolside: Popular for contrast therapy. Keep 6+ feet from pool edge. GFCI electrical required near water (NEC Article 680)
- Proximity to house: Consider the walk in a towel during winter. Also consider electrical distance from the panel — longer runs need heavier gauge wire
Environmental factors
- Sun: Partial shade is ideal. Afternoon sun adds heat load in summer and accelerates UV aging. Morning sun helps dry dew
- Wind: Wind cools the exterior, making heaters work harder. Shield from prevailing winds — fence, wall, or hedge
- Privacy: You'll be in minimal clothing with the door sometimes open. Consider sightlines from neighbors and roads
- Views: Orient the glass door toward the best view — mountain, garden, or sunset. It transforms the experience
Foundation requirements
Level is non-negotiable. An unlevel sauna stresses joints, prevents the door from sealing properly, and causes structural issues. The base should slope slightly away from the sauna (1/4" per foot) to prevent water pooling against the bottom. Even on concrete, consider a thin rubber mat or membrane underneath to prevent moisture wicking.
In cold climates, concrete footings should extend below the frost line — a floating slab may shift with freeze/thaw cycles. Consult a local contractor familiar with your frost depth.
Electrical requirements
Outdoor electrical near heat and water is NOT a DIY project. Hire a licensed electrician. NEC Article 424 (Fixed Electric Space Heating) applies. Many jurisdictions require permits and inspections for outdoor electrical installations.
- Dedicated circuit: Most infrared saunas require 20A/120V or 30A/240V (depending on size and heater configuration)
- GFCI protection: Required by NEC code for all outdoor electrical — this is not optional
- Outdoor-rated conduit: PVC, rigid metal, or liquid-tight flex. No exposed Romex outdoors
- Disconnect switch: Weatherproof disconnect within sight of the sauna — required by code in most jurisdictions
- Wire gauge: Longer runs (50+ feet) require larger gauge wire to prevent voltage drop. Your electrician will calculate this
- Inspection: Check with your local building department for permit requirements
Weather protection — engineering for the elements
Rain and snow
The roof must be sealed with proper overhang and drainage — water must never pool on top. Minimum roof pitch: 1/4" per foot for runoff. All wood joints sealed against moisture intrusion. Door gasket must create a weather-tight seal. In heavy snow areas, the roof must support local snow load requirements — SaunaCloud designs for your specific climate.
Temperature extremes
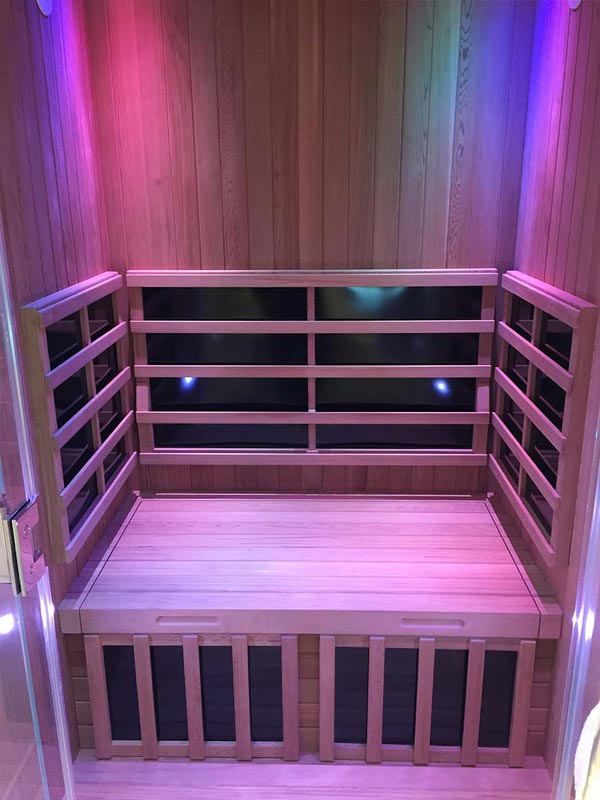
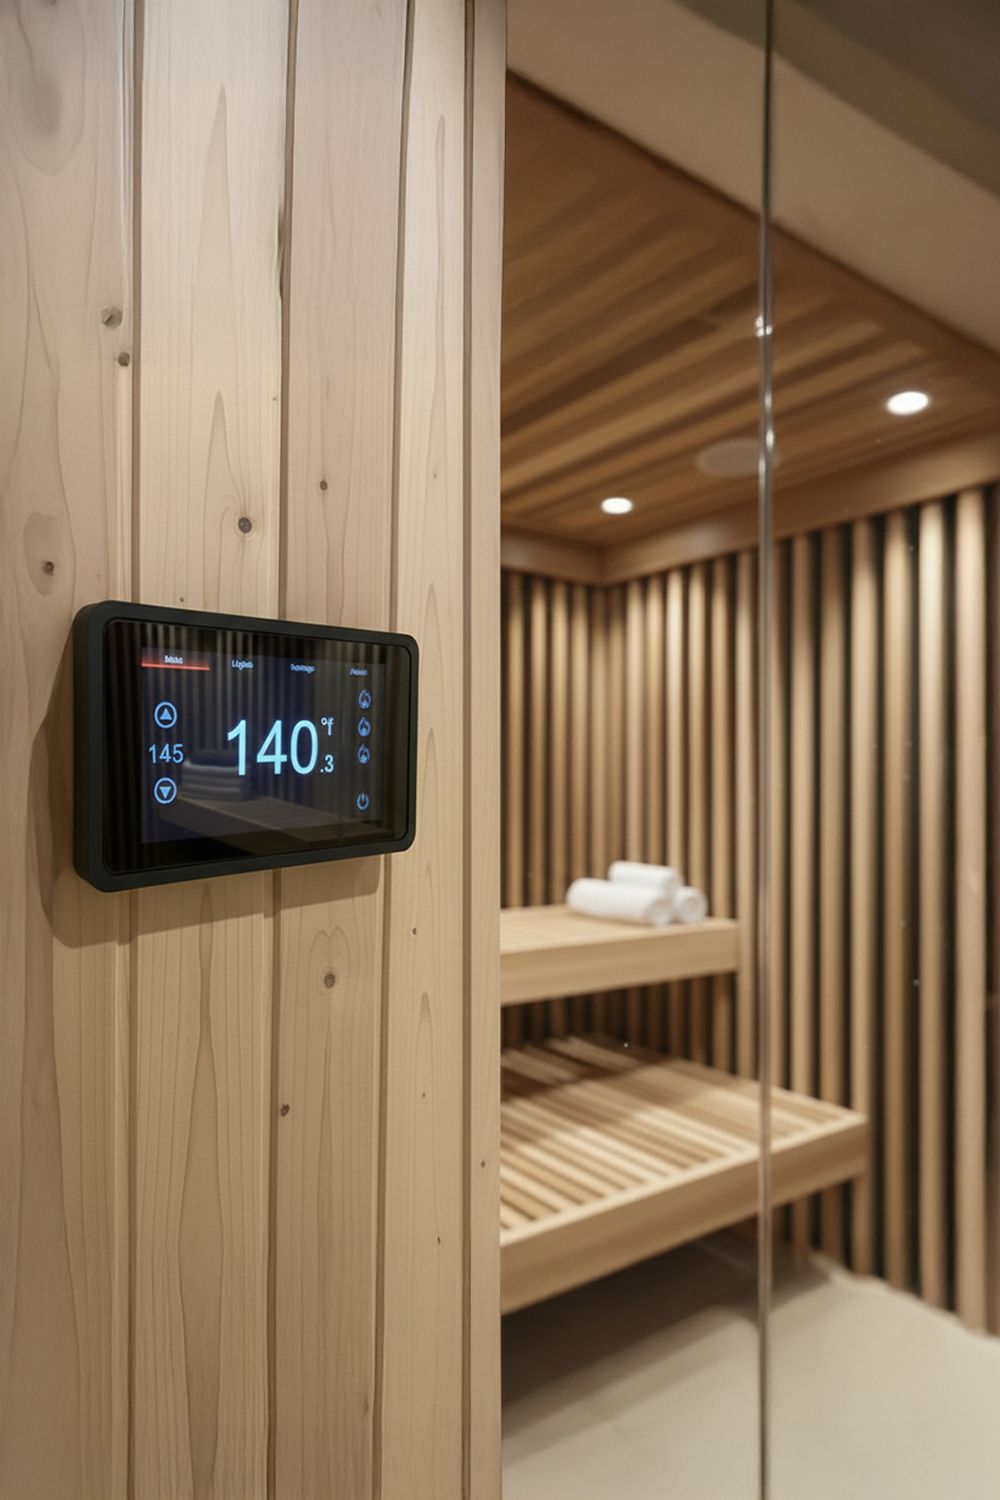
- Cold climates (-20°F and below): Upgraded insulation (R-8 to R-13) is essential. VantaWave heaters are powerful enough but starting from -20°F means 15-20 minutes of preheat vs 5-10 in temperate climates. Many Canadian customers use their outdoor saunas year-round
- Hot climates (110°F+): The sauna reaches temperature faster but feels hotter with less temperature differential. Shade and evening sessions help. The outdoor experience in dry desert climates is exceptional
- Humid climates: Condensation forms inside when the sauna cools. Always leave the door open 15-20 minutes after sessions for ventilation. Western Red Cedar handles humidity cycling naturally — it's used in exterior siding for this reason
- Freeze/thaw: Tongue-and-groove joinery accommodates natural wood expansion and contraction. Glued joints fracture with temperature cycling — another reason zero-glue construction matters
Insulation
Indoor saunas have the house insulation around them. Outdoor saunas have only their own insulation against the elements. Standard indoor insulation (R-3 to R-5) is insufficient for outdoor use in cold climates. SaunaCloud outdoor models use R-8 to R-13 depending on your climate zone, with mineral wool insulation (heat-resistant, moisture-resistant, no off-gassing) and a vapor barrier on the warm side.
The contrast therapy advantage
This is the #1 reason people choose outdoor saunas: proximity to cold exposure.
- Sauna → cold plunge tub: The most popular setup. Position a cold plunge 5-10 feet from the sauna door. 30 min sauna at 135-140°F → 2-5 min cold plunge at 50-59°F → 10 min rest → repeat
- Sauna → natural water: Lakeside, river, or ocean. The Finnish tradition — step out of the sauna and into natural cold water
- Sauna → snow: In winter climates, rolling in snow between rounds is the Nordic tradition
- Sauna → outdoor shower: A cold outdoor shower between rounds — simpler than a plunge tub
The temperature differential triggers both heat shock proteins AND cold shock proteins — the full hormetic response. This is what the Søberg protocol and Huberman protocols are built on.
Maintenance — outdoor-specific
Everything from the standard cleaning guide applies, plus outdoor-specific care:
- Exterior wood: Apply UV-protective cedar oil annually (Penofin, Cabot Australian Timber Oil, or natural tung oil). Or accept natural silver-gray patina — some owners prefer it
- Roof: Inspect seals annually, especially after heavy snow. Clear debris (leaves, branches) regularly
- Drainage: Ensure paths away from the base stay clear. Standing water against the base is the #1 outdoor sauna killer
- Pests: Cedar naturally repels many insects. Check under the sauna periodically. Keep base elevated and vegetation clear
- Electrical: Inspect exterior conduit annually for weather damage, corrosion, or animal interference
- Ventilation: Leave door open 15-20 minutes after every session — essential in humid climates
Cost: outdoor vs indoor
Outdoor saunas typically cost 20-40% more than equivalent indoor models — upgraded insulation, weather-resistant roof, outdoor electrical components, UV treatment, and site preparation. But they don't require sacrificing indoor living space. No bedroom conversion, no closet conversion, no bathroom renovation. For homes with limited indoor space, outdoor is often the only option.
And the experience itself — fresh air, nature, views, contrast therapy access — is something an indoor sauna simply can't replicate.
Planning your project — step by step
- Choose your location — foundation, electrical access, privacy, wind, sun, views
- Check local codes — permits needed? Setback requirements? HOA restrictions?
- Book a call with SaunaCloud — discuss space, climate, and goals. Send photos and measurements. 800-370-0820
- Site preparation — pour pad or prepare base. Have electrician run the dedicated circuit
- SaunaCloud ships the sauna kit — custom-designed for your outdoor conditions and climate
- Contractor builds per SaunaCloud's detailed plans with phone/video support
- Electrical connection and inspection — licensed electrician, permit if required
- First session — enjoy your outdoor infrared sauna
Frequently Asked Questions
Yes, but it must be purpose-built for outdoor use. An indoor sauna placed outside will fail within 2-5 years from moisture intrusion, inadequate insulation, UV damage, and weather-related electrical issues. A properly engineered outdoor infrared sauna has sealed roofing with drainage, R-8 to R-13 insulation, outdoor-rated GFCI electrical, and weather-resistant construction — lasting 20-30+ years.
A level, stable surface with drainage away from the base. Best options: a 4-inch concrete pad with slight slope, compacted gravel pad (4-6 inches crushed gravel over landscape fabric), or a structurally adequate deck. Never place directly on bare ground — moisture wicks up and causes damage even to cedar. Level is non-negotiable for structural integrity and door sealing.
A dedicated circuit (typically 20A/120V or 30A/240V depending on size), GFCI protection required by NEC code, outdoor-rated conduit from your panel to the sauna, and a weatherproof disconnect switch within sight of the sauna. Hire a licensed electrician — outdoor electrical near heat is not a DIY project. Many jurisdictions require permits and inspection.
Yes. SaunaCloud outdoor models are designed for extremes including -20 degrees F and below. Upgraded insulation (R-8 to R-13) and VantaWave heaters maintain therapeutic temperatures. Preheat time is longer in extreme cold (15-20 minutes vs 5-10 in mild weather). Many Canadian and Northern US customers use outdoor saunas year-round, including through winter.
Standard cleaning plus outdoor-specific care: apply UV-protective cedar oil annually, inspect roof seals after snow season, ensure drainage paths remain clear, inspect exterior electrical conduit for weather damage, and keep the base area clear of vegetation. Always leave the door open 15-20 minutes after sessions for ventilation. Cedar naturally resists rot and insects.
Outdoor saunas are ideal for contrast therapy — the primary reason many people choose outdoor installation. Position a cold plunge tub 5-10 feet from the sauna door. Protocol: 30 minutes sauna at 135-140 degrees F, then 2-5 minutes cold plunge at 50-59 degrees F, 10 minutes rest, repeat. This triggers both heat shock and cold shock proteins — the full hormetic response.
Typically 20-40% more than equivalent indoor models due to upgraded insulation, weather-resistant roof construction, outdoor-rated electrical components, and UV-protective wood treatment. However, outdoor saunas don't require sacrificing indoor living space and provide an experience — fresh air, views, contrast therapy — that indoor saunas can't replicate.

Founder & Lead Designer, SaunaCloud®
3,000+ custom saunas built since 2014 · Author of The Definitive Guide to Infrared Saunas · Featured in Forbes, Inc., and MSN
Chris has been designing and building custom infrared saunas since 2014. He wrote one of the first comprehensive books on infrared sauna therapy and is personally involved in every SaunaCloud build — from design consultation through delivery and beyond.
Continue Reading
Engineered for Your Climate — Not a Box Placed Outside
SaunaCloud Outdoor models: R-8 to R-13 insulation, sealed roof with drainage, VantaWave heaters rated for -20 degrees F to 110+ degrees F. Send us photos of your space — we'll design for your exact conditions. 800-370-0820.